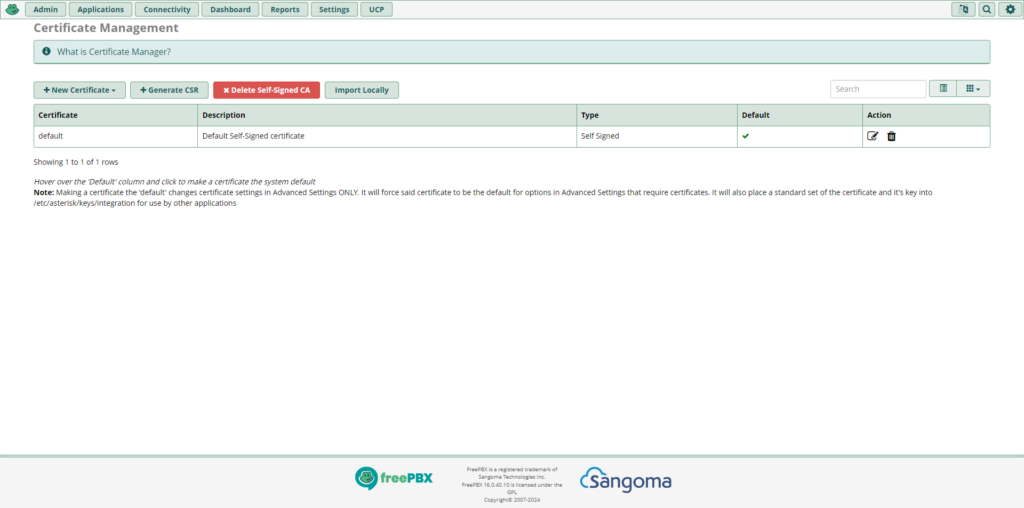
This blog post will explain how to enable TLS or transport layer security for FreePBX. Something to consider is a risk of SIP and RTP connections being intercepted. That means SIP messages and RTP streams can be read and listened to. Because of those security risks, it is a good idea to only use unencrypted connections with a LAN and not a WAN. WAN stands for wide area network and is a connection to the Internet. To make calls more secure over the Internet, encrypted versions of them can be used. SIPS is SIP extended with TLS certificate. SIPS stands for SIP secure. TLS allows a secure connection over the Internet between a transmitter and receiver. SRTP encrypts the voice packets to be sent from the caller to the other person on the line. For someone to use those two protocols, each device used has to support them. If one of the peers does not have that capability on their device, calls can not be secured from prying eyes. SIP phone systems that are hosted in the cloud need protection from hackers. In the FreePBX administration dashboard, click Admin and select certificate management. There will be a self signed TLS certificate. That is going to be the default TLS certificate that will encrypt phone calls to and from a SIP client.

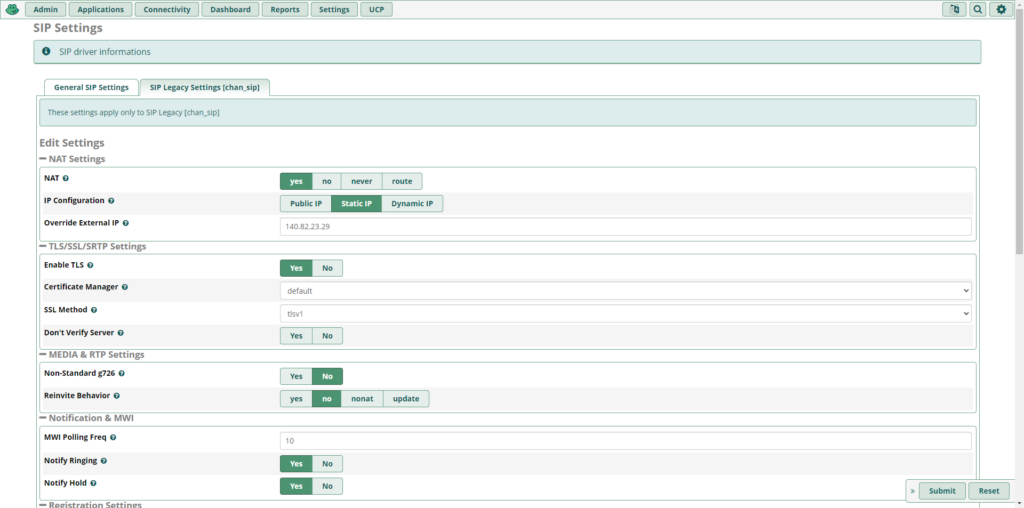
The next step is to click asterisk SIP settings and click the second tab that says SIP legacy settings since a chan_sip trunk was used for this blog post. At that section, go to tls/ssl/srtp settings. Then click yes to enable TLS, select default for certificate manager, and select tlsv1 for SSL method.

Then the client has to be configured to take advantage of TLS encrypted phone calls. The image below indicates what options to pick to take advantage of encrypted communications.

FreePBX 16 was used to write this blog post.